|
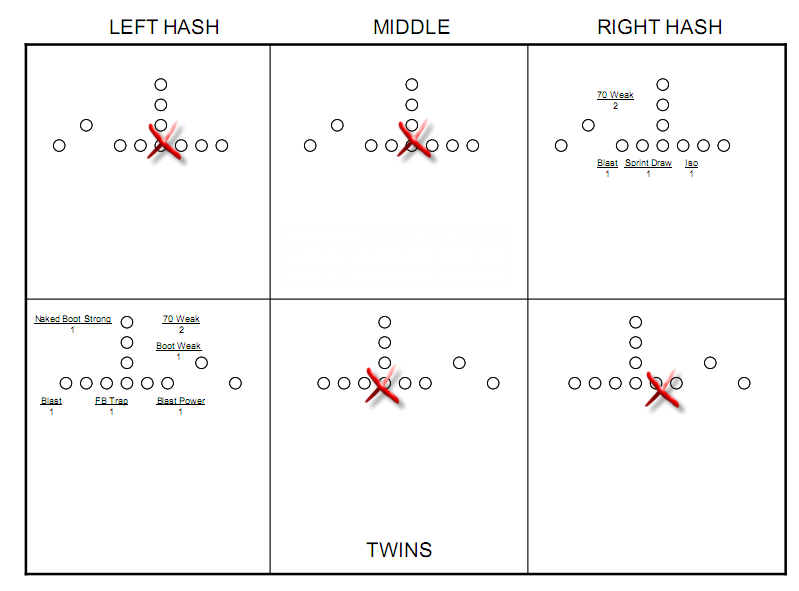
The Formation Hit Chart Formation Hit Charts come in many variations. The idea is to record each play that is run from a Formation and the frequency that play was run. In this first variation, a chart with 6 boxes is prepared for each formation. There are 2 Rows and 3 Columns, with the top row showing the Formation Strength to the Right and the bottom row showing the Formation Strength to the Left. Columns for Left Hash, Middle of the Field and Right Hash produce the 6 box chart and make it possible to chart all variations. When completed, the chart looks like this:. (Note: we added the red X's to emphasize the point that in this particular game, this particular team used the Twins Formation in only 2 of 6 possible formation/hash combinations). In this particular case, Twins was the second most used formation of the team charted, and the 2 Receivers were always to the field.
Formation Hit Charts become more relevant when more than one game is charted. In this second variation, a chart with 6 boxes is prepared with 1 box for each formation. This simpler variation of the Formation Hit Chart does not include the Hash or show Formation Strength. This type can be completed more quickly - even during a game as it progresses. The result is something like this :
We designed this Template that combines the 2 Hit Charts shown above Links to more Hit Chart templates 4 Box Formation Summary Template 6 Box Formation Summary Template |